Sunday, 6 November 2016

Lego Spice Rack - repurposed

A few years ago, Bobby and I hand made a lego spice rack. We bought the wood for 1$ (seriously!) at the Home Depot scrap area and we used the spice jars that came with our old spice rack. As the years went on, we ended up buying spices that came in plastic containers... and never bothered with the pouring of new spice into existing spice jar process... which made the spice rack redundant. I didn't want to get rid of the spice rack completely, so we repurposed them into bookends :)

Well, actually, Bobby repurposed them into bookends (click here for more info on how he converted the block from spice rack to bookends).... and voila:

Close up of our new heavy duty bookends :)
Two red lego block bookends on our shelf (which Bobby also made). I know this is a mess right now - we plan on adding an extra shelf so we can have more space to store our stuff and pictures :)

Thursday, 13 October 2016

One year later....

It's officially been a year since Kiwi went to hedgehog heaven... we miss her a lot!!

My little burrito

Sunday, 2 October 2016

The updated desk/make up/craft area

We've been living in our current apartment for just over two and a half years now and I am finally working on updating/organizing my desk/make up/craft area. This area is a small-ish 15 square foot space on one end of the master bedroom.

When we first moved in, I only had a desk and chair. As you can see, there was a serious shortage of storage! The desk I got second hand from my work 'Craiglist' site. The desk is the Malm Dressing Table and it's perfect! It's got a glass top and one large drawer. I store all of my make up and make up bags (you know, the ones you get in the Clinique Bonuses, etc) in the drawer... which means there is no space for pens, papers, etc.

I got the chair from Winner's... but you can get similar ones from Restoration Hardware. I love the look of this chair, but it kind of annoys me how I cannot tuck my chair under my desk because of the chair arms... 

Due to a lack of storage, I bought a small filing cabinet from Best Buy. This unit is pretty functional. The bottom drawer is filing space (which only uses legal sized hanging files) and the top drawer is for pens and other junk you don't want in your face all.the.time

I also got a small shelf, also from Ikea. I bought one shelf door to hide my junk. 

This is how the wrapping paper and my craft supplies were stored. The wrapping paper was in a big purple bin (from Winner's) and my craft supplies were in boxes (from Michael's) stored in a big pink bin (from Ikea). The space was functional enough but it was not pretty to look at! Also, I was running out of space. I wanted to better organize my craft supplies, but I needed more bins.. and more space!

 So I went ahead and bought this shelf from Michael's... and two more boxes (the two blue ones).  Now all of my craft supplies are sorted... and easily accessible!

For easier access, I decided to put my pens, markers and pencil crayons in canisters. The gray tray on the left holding the scotch tape and washi tape is a utensil holder. The pink plastic box is from the dollar area at Staples many years ago. The metal canisters holding the white out, paper clips, etc was on clearance from Michaels....

These two metal canisters (and the larger green one from the previous picture) are all from Winner's. The sewing kit I made myself. I like having the pencil crayons/markers out because sometimes, I need just one or two certain colours for a certain art project. I like being able to just grab what I need instead of having to take the whole box out... 

And here is what the space looks like as of today! I am happy with how this space turned out! There's a ton of storage now with more space to grow. The bottom bin is completely empty, and the one just above that contains colouring books (which can easily find new homes).

Disclaimer: Since my desk is actually a dressing table, its pretty small. I pretty much only do my make up at this desk. I carry the art supplies that I need (which are now beautifully organized) and bring it to our dining table or coffee table when crafting :)

Next steps:
- Creating storage space for wrapping paper. The wrapping paper is currently hanging out in the spare bedroom. I want to create a space for it to be placed to the left of the craft shelf. I don't really plan on buying wrapping paper after my current stock runs out (they're pretty terrible for the environment because they are so wasteful! Gift bags, or no wrapping at all, is really the better choice) so I don't know if I want to spend time/effort/resources on this...
- Creating a better storage for the washi tape (and ribbons!)
- Decide if I want to upgrade my chair or not. I am thinking of getting this chair at Canadian Tire (which is actually on sale right now!)... but because I don't spend a lot of time sitting here, I am not sure if I want to spend money on a new chair. I might just get a throw pillow to make my current chair more comfortable...

Hope you enjoyed the space!

Thursday, 22 September 2016

DIY mason jar sewing kit

First of all, this idea is not mine. If you scour the interwebs, you can buy these pre-made, or find instructions on how to make your own.

Note: This is very simple to put together. It took less than 15 minutes to make!

Supplies needed:
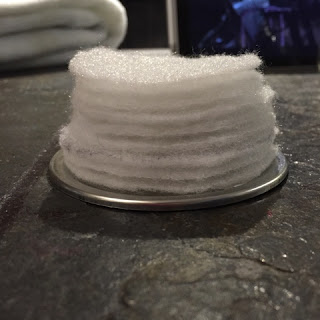
- Batting (or some kind of stuffing). *Note: I only have low batting at home that I am using for another project and this works perfectly fine. To make it look rounder, I just layered it up.
- Fabric of some sort. Michael's sells small squares of pattern (way more than you need for one jar) for $1.99
- A mason jar. Pick your own size. I decided to go with a 1L jar
- Scissors
- Glue gun
- Not mandatory: Something to watch on the Surface Pro! (Gilmore Girls :))

Step 1: Cut your batting. I made 3 circles of 3 different sizes (9 in total)
Step 2: Cut enough fabric to cover your lid and the batting. Note: don't make this too large or it will be a mess to glue/fold. Other websites suggest a diameter that is 1 inch larger than the lid

Step 3a: Place batting on mason jar (Note: I did not glue this down)
Step 3b: Put the mason jar and batting on the fabric. Make sure the batting is the part that is touching the fabric. Also, make sure the fabric is upside down. Glue the fabric onto the mason jar. 
Step 4: Put the lid back into the band... and voila! You have a mason jar sewing kit!
I know my jar is empty right now. But the idea is to stock the jar with scissors, thread and a measuring tape (things you need to sew, duh!) and the lid is meant to be the pin cushion.

This is so adorable! I can't wait to add it into my craft area (which is currently 'under construction')

Tuesday, 6 September 2016

The return of the giant cheese grater(s)

Okay so one of my most popular blog posts is the one when I posted about a giant cheese grater I saw at Winners! A couple of people contacted me about where they could buy this cheese grater... But they contacted me months after and the grater was already sold.

So.... I was at Winners today (the one on Cambie and West 8th in Vancouver) and saw not one, but TWO cheese graters. Get them while you can folks!  

They are 99.99$ before tax. 


Sunday, 14 August 2016

The Microsoft Surface Pro 4

Soooo excited because I finally have a new laptop! Back in 2008, I bought a MacBook which lasted until it was too old for upgrades (about 5 years or so). When it was time for a new laptop, I cheaped out and bought a really crappy Acer one for 500$... which worked fine enough... minus some really annoying screen issues (eg: problems turning the screen on even though the laptop was awake).

Anyway, I toughed it out with the crappy laptop for 3 or so years.. until today!


You are looking at my newest baby, the Microsoft Surface Pro. I didn't go top of the line because I don't need a 2000$ laptop (and yes, these tablet looking screens are full laptops - take that iPad!).

So excited to use this laptop - it will surely enhance my online shopping experience ;)

Happy Sunday!

Tuesday, 26 July 2016

Airmiles - the dumbest loyalty card ever?!

Okay, so everyone is in a panic because your Airmiles that you have been collecting but are not using will expire after 5 years. (Eg: all of those hard earned miles from 2011 will expire this year unless you use them!)

I don't really collect Airmiles but I do have a loyalty card from back in the day. I decided to have a look to see if I had miles expiring and what I could trade them in for.

Well, today is my lucky day! Because I am an Airmiles member, I can avail of this WONDERFUL deal:


For 50 Airmiles points AND 95$, I can get a 100$ gift card to Thirfty's (and a few other stores). Um... what?! So I am paying 95$ for a 100$ gift card? What kind of lame deal is this?! You can get far better deals for giftcards using CardSwap Canada.

No bueno, Airmiles!!!