First of all, this idea is not mine. If you scour the interwebs, you can buy these pre-made, or find instructions on how to make your own.
Note: This is very simple to put together. It took less than 15 minutes to make!
 |
Supplies needed:
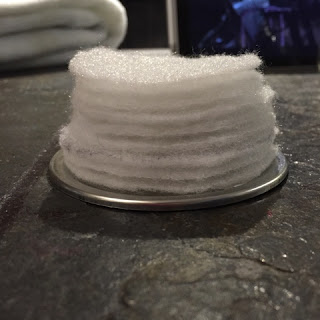
- Batting (or some kind of stuffing). *Note: I only have low batting at home that I am using for another project and this works perfectly fine. To make it look rounder, I just layered it up.
- Fabric of some sort. Michael's sells small squares of pattern (way more than you need for one jar) for $1.99
- A mason jar. Pick your own size. I decided to go with a 1L jar
- Scissors
- Glue gun
- Not mandatory: Something to watch on the Surface Pro! (Gilmore Girls :))
|
 |
| Step 1: Cut your batting. I made 3 circles of 3 different sizes (9 in total) |
 |
| Step 2: Cut enough fabric to cover your lid and the batting. Note: don't make this too large or it will be a mess to glue/fold. Other websites suggest a diameter that is 1 inch larger than the lid |
 |
| Step 3a: Place batting on mason jar (Note: I did not glue this down) |
 |
| Step 3b: Put the mason jar and batting on the fabric. Make sure the batting is the part that is touching the fabric. Also, make sure the fabric is upside down. Glue the fabric onto the mason jar. |
 |
| Step 4: Put the lid back into the band... and voila! You have a mason jar sewing kit! |
I know my jar is empty right now. But the idea is to stock the jar with scissors, thread and a measuring tape (things you need to sew, duh!) and the lid is meant to be the pin cushion.
This is so adorable! I can't wait to add it into my craft area (which is currently 'under construction')


No comments:
Post a Comment